This recipe started as an adventure and ended in a taste sensation. To get this recipe we had to get up at 4.30 am to make it to Sarah Ratzabi’s place by 6.00. Sarah is a Yemenite woman living on a religious moshav north of Tel Aviv. Every Friday morning she and her friends (Nama and Batiah) make pita bread and cook it in a traditional oven (Taboon). My wife (Galit), sister-in-law (Ornit) and myself spent a delightful few hours following them through their ritual.

Pita
The recipe below is basically Sarah’s although her friends had to help out a bit on exact quantities. It made the softest, most delicious pita bread I’ve ever eaten. None of the women measured the amount of water; they just judge the consistency of the final product. As it happens they disagreed on the exact consistency to make it perfect, but all agreed that the dough had to be very moist. The recipe uses 4 kg of flour and made 13 large pita (called “Lafa”) and four small ones. I’m guessing 3 small ones = 1 big one.
While we watched the cooking Chaim, the husband of Batiah, fed us a few Yemen treats. Although it was all good, my favourite was the Pita itself. Our first taste was hot pita with honey drizzled into the pocket then dipped into clarified butter (think ghee) – which was divine.
Ingredients
Method
- Mix yeast, oil, salt, sugar and water in a giant round bowl (almost a tub). Leave to froth.
- Add 2 kg flour to yeasty water. Mix roughly by hand.
- Knead in the bowl until all flour absorbed. The mixture is quite wet and stays wet. The kneading motion is more like scooping and folding over, with occasional pinching. It is always on the edge of the bowl and counter-clockwise.
- Add another kg of flour and a slosh of water to the bowl knead until mixed.
- Add yet another kg of flour (that makes 4 kg of flour in total) and a slosh of water. Knead until mixed.
- Rest 10 min. It will start to rise.
- Knead in handfuls of water until the mixture doesn't stick to your hand any more. The mixture should be slick and smooth and sufficiently wet that it falls off your hand and away from the bowl walls. If it gets too wet then sprinkle flour on the dough and knead in.
- Cover and leave to rise 20 minutes in a warm place. The dough should rise to the top of the bowl and get less sticky.
- Sprinkle some flour on a part of the dough mass. Knead that part of the dough mass a bit.
- Pinch of a large blob of dough (about 350 grams worth) from the recently kneaded bit. Bear in mind that the amount of dough we’re talking about is half the size of a western loaf of bread – this is a big pita.
- Transfer the dough blob to a floured work surface. Sprinkle flour on the dough blob. Knead/shape into a ball.
- Repeat until you’ve a bunch of dough balls, which gives them time to rise a bit more.
- Sprinkle flour over one ball (or all of them).
- Flatten your chosen ball roughly with your hands. Lay your flattened ball on a round cushion or Machbazi2.
- Stretch the dough out over the entire Machbazi.
- When the Taboon3 is hot and dry. Use the Machbazi to slap the dough onto the plate of the Taboon.
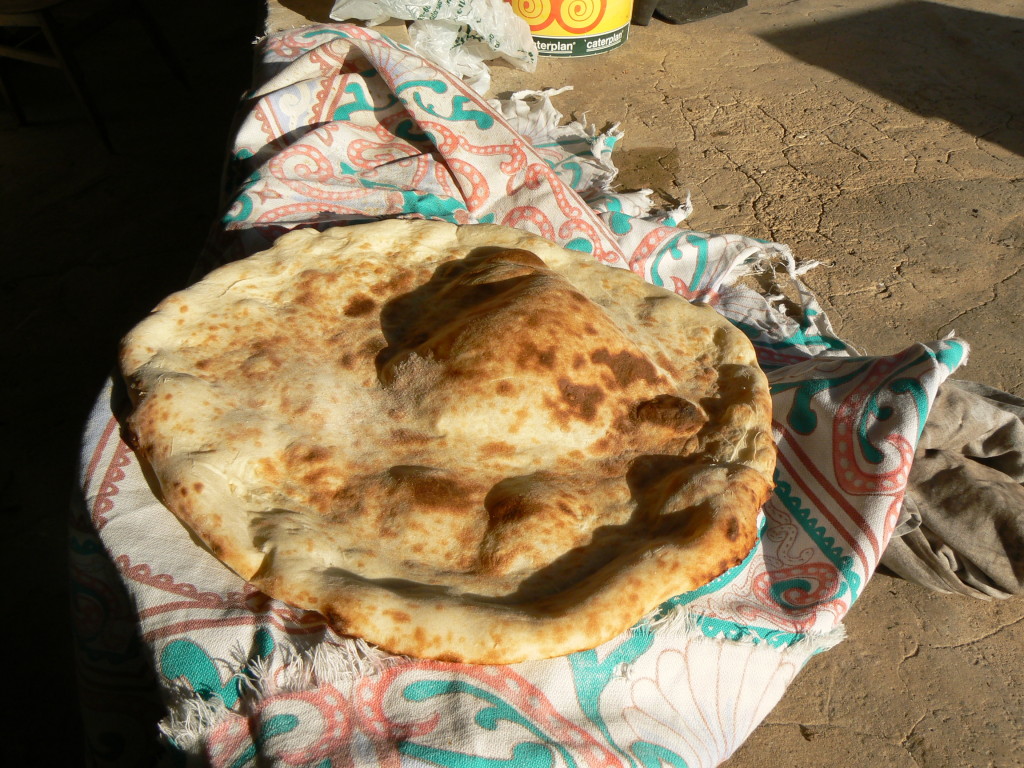
- Cook, turning, until puffed and brown on top. The Pita puff up quite a bit, particularly the small ones.
- Remove the cooked Pita, stack, and cover.
- Wipe the plate of the Taboon.
- Repeat until all done.
Notes
(2) If you don't have a Machbazi then consider a round cushion with a cloth cover
(3) If you don't have a Taboon try baking on 200º C on a hot dry pizza stone in the oven. And you might want to use a Pizza peel instead of a Machbazi.
Makes 14 large pita (called "Lafa") or 45 small pita

Shlomo and Sarah Ratzabi
Making the Dough
Sarah had yeasted up before we arrived so when we walked in started throwing flour and water into the yeast and began the kneading. She kneaded in the same giant round plastic bowl (almost a tub) where she was mixing the dough.

Sarah kneading
She would pour in a bag of flour then follow it with a slosh of water. After mixing roughly by hand she would knead until until all of the flour was absorbed. The mixture was quite wet and stays wet, and Sarah’s kneading style reflects that. She only used one hand (her right). The kneading motion is more like scooping and folding over, with occasional pinching. It is always on the edge of the bowl and counter-clockwise.
Sarah sloshed the water in so the amount of water is very vague. She had a small metal jug next to her and all these sloshes came from the jug. She always poured the water over her kneading hand, which at this stage was covered in wet dough.
Once she’d got all the flour into the dough she let it rise.

Dough rising
Then she began to knead in handfuls of water. This time she had a bowl of water next to her. To add water she would scoop up a handful (with her mixing hand) and splash it on. She’d then knead it into the dough mass. She said it was ready when the mixture didn’t stick to her hand any more. So repeat with handfuls of water until the mixture is slick and smooth and sufficiently wet that it falls off your hand and away from the bowl walls. If it gets too wet then sprinkle flour on the dough and knead in – all the women seemed to flour the dough for one reason or another fairly frequently.
Up until this point the whole exercise has taken about 30 minutes.
Sarah then covered the dough and left it to rise 20 minutes. Actually there was no magic to this time, it just seemed to be the time it took to walk from Sarah’s house to Batiah’s were the Taboon was, to say hi, and to stoke up the fire.

Walking to taboon
During this time Sarah’s dough rose to the top of the bowl. It also seemed to get less sticky, which she said was normal – must figure that out.

Risen dough
Cooking the Pita
A Taboon is the traditional oven used for baking Pita. This one used fire wood. The bread is cooked on the big round metal plate which could swing in and out of the oven and could rotate.

Taboon
Sprinkle some flour on a part of the dough mass. Knead that part of the dough mass a bit.

Sarah sets up for shaping

Kneading
Pinch of a large blob of dough (about 350 grams worth) from the recently kneaded bit. Bear in mind that the amount of dough we’re talking about is half the size of a western loaf of bread – this is a big pita (called a Lafa). The blob was much bigger than Sarah’s hand, so she actually used two pinches and a pull to free the blob from the rest of the dough. Once again this was all done with her right hand.

Pinch off a dollop

Pull it off
Transfer the dough blob to a floured work surface (in Sarah’s case a large metal tray).

Pat and place
Sprinkle flour on the dough blob. Knead/shape into a ball. Repeat until you’ve a bunch of dough balls, which gives them time to rise a big more.
Sprinkle flour over one ball (or all of them). Flatten your chosen ball roughly with your hands. The dough balls in the picture below are, from top left, a large unflattened ball, four small unflattened balls, and finally a large flattened ball.

Large Lafa and small pita
Lay your flattened ball on a round cushion. Actually it wasn’t a cushion. It was a Machbazi, a specialist wicker instrument with a handle on the back and a padded cushion on the front, which when used is entirely covered in a separate piece of white cotton. But in the absence of a Machbazi you might use a cushion.

Machbazi

Dough on Machbazi
Stretch the dough out over the entire Machbazi.

Stretch dough

Stretch dough
When the Taboon is hot and dry. Use the Machbazi to slap the dough onto the plate of the Taboon.

Slap onto taboon

Roll Machbazi

Lift off Machbazi
Cook, turning (which is really easy with a Taboon as the plate revolves) until puffed and brown on top. Note they only cook the bottom of the pita directly, the top is only cooked through indirect heat. The Pita puff up quite a bit, particularly the small ones.

Cook the pita

Turn and cook

Turn and cook

Two pita cooking
Remove the cooked Pita, stack, and cover.

Remove pita
Wipe the plate of the Taboon.

Wipe plate
Repeat until all done.

Sarah, Nama and Batiah with a pita feast
Yehudit and the Electric Option
Our introduction to Sarah and her friends was via Yehudit, who also makes Pita on Friday morning, but uses an electric Taboon. It seems that otherwise the process and recipe is much the same.

Electric taboon

Yehudit with machbazi

Stretching dough

Cooked pita
Chaim likes it hot
Chaim, the husband of Batiah, kindly fed us a few Yemen treats as we watched the process.

Chaim
Lachuchua – Yemenite Pancakes or Sponge Bread, which I was pleasantly surprised tasted like mine

Lachuchua (Yemenite Pancake)
Chilbeh – like a very spicy pesto with chilli. They traditionally use this to flavour soup, but I just dunked a piece of Lachuchua into it .

Chilbeh
Pilpil Chariv – literally “Hot Pepper”, which from a culture that likes their food hot, is a scary thought. This is a dry spice mix made from chilli, garlic, salt and fresh Zaatar. I sprinkled a tiny bit on a piece of Lachuchua.

Pilpil Chariv (Hot Pepper)
While I do not intend to make pita at home, this article, recipe and photos are very educational.
One of my favorite places to eat in Brooklyn is a Yemeni restaurant on Atlantic Ave and their pita bread is unique – enormous and tasty. It looks very much like the “lafa” you mentioned in your post.
Sorry if this is an ignorant question from an outsider, but do Yemenite Jews eat the same cuisine as Muslims from Yemen (like the people who own the restaurant I go to in Brooklyn)? It certainly look that way based on the photos.
Thanks for documenting this interesting recipe!
It was a lovely experience for me. I much prefer lafa to normal pita, but they are quite a mouthful.
Yemenite Jews brought a lot of regular Yemeni culture and cuisine to Israel.